 SAL - AI
Insights / Guides
How to run ChatGPT ads: from creating a pixel to launching a campaign
SAL - AI · Updated: 07/10/2026
This article goes step by step through OpenAI's Vietnamese-language Ads Manager interface, running a campaign optimised for customers submitting their details (the Lead Created event). Suitable for service businesses: education, study abroad, travel, interior design, software.
The order to remember
- Create a pixel and add the code to your website.
- Create a Lead Created conversion event and add the event call to your form.
- Check that the event is being received.
- Create the campaign, ad group and ad.
- Review and submit for approval.
Set up tracking first, build the campaign second. If you do it the other way round, the system has no data to optimise with and you can't tell which ads bring in customers.
Before you start
- An ad account at ads.openai.com with a payment method added.
- A landing page with a sign-up form that works well on mobile.
- Permission to edit the website's source code, or a website developer to help.
- Your product is not in a restricted or prohibited category. See What are ChatGPT ads.
Step 1. Create a data source (pixel)
In Ads Manager, open Conversions in the left column, choose the Data sources tab, then click Create. Give it an easily recognisable name, such as your website name, then click Create.
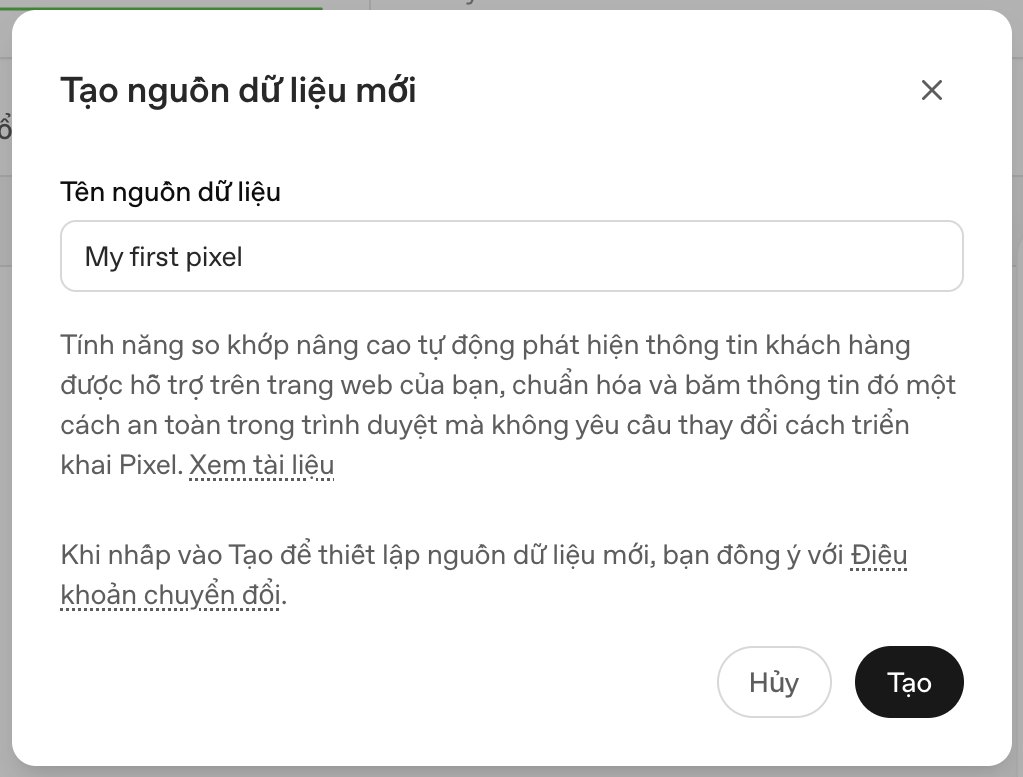
Note: each website only needs one pixel. Each click on Create generates a new pixel with a different ID. If you accidentally create two pixels, the website only sends data to the pixel whose code is on the page, and the other pixel will always be empty.
Step 2. Add the setup code to your website
Once created, Ads Manager shows the Pixel ID and the Setup code. Copy the setup code and paste it into the page's <head> section, as close to the top as possible. Add it only once per page.
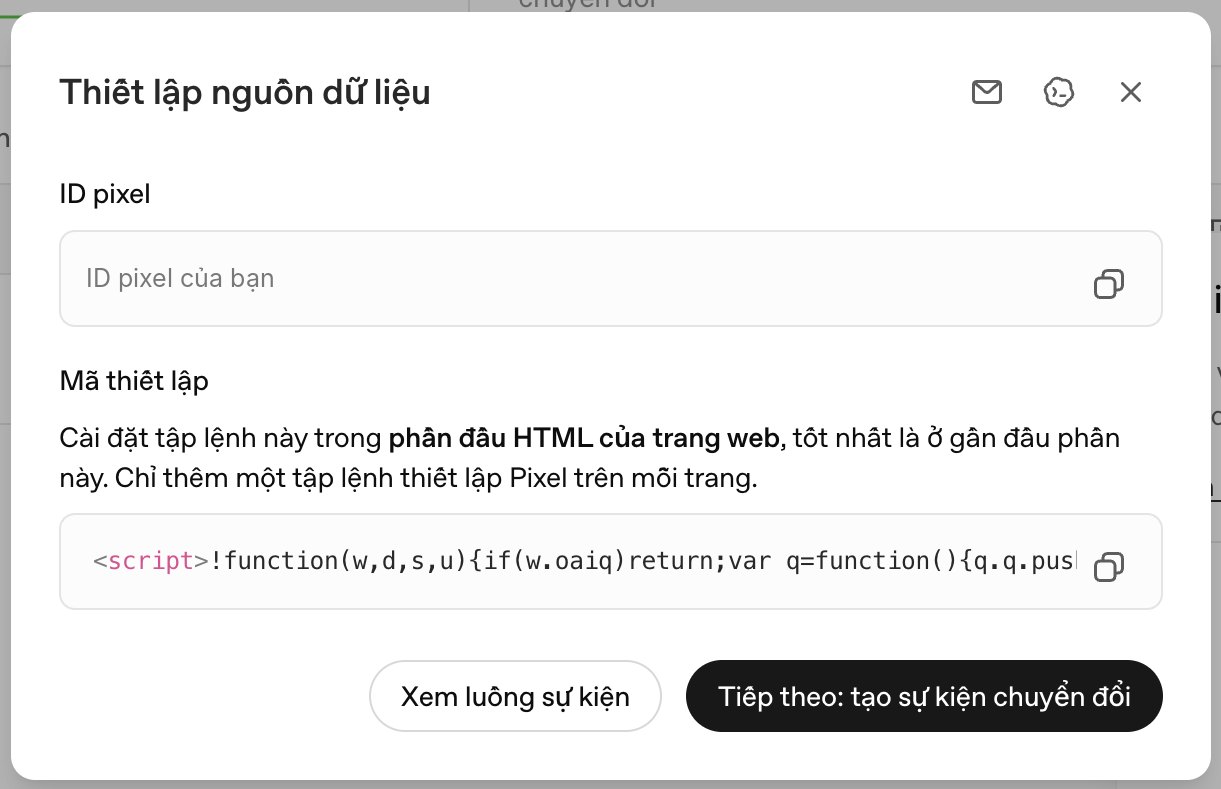
You can add it to the whole website or only to the landing page that receives ad traffic. If you only send ads to one page, adding it to that page is enough.
Step 3. Create the Lead Created conversion event
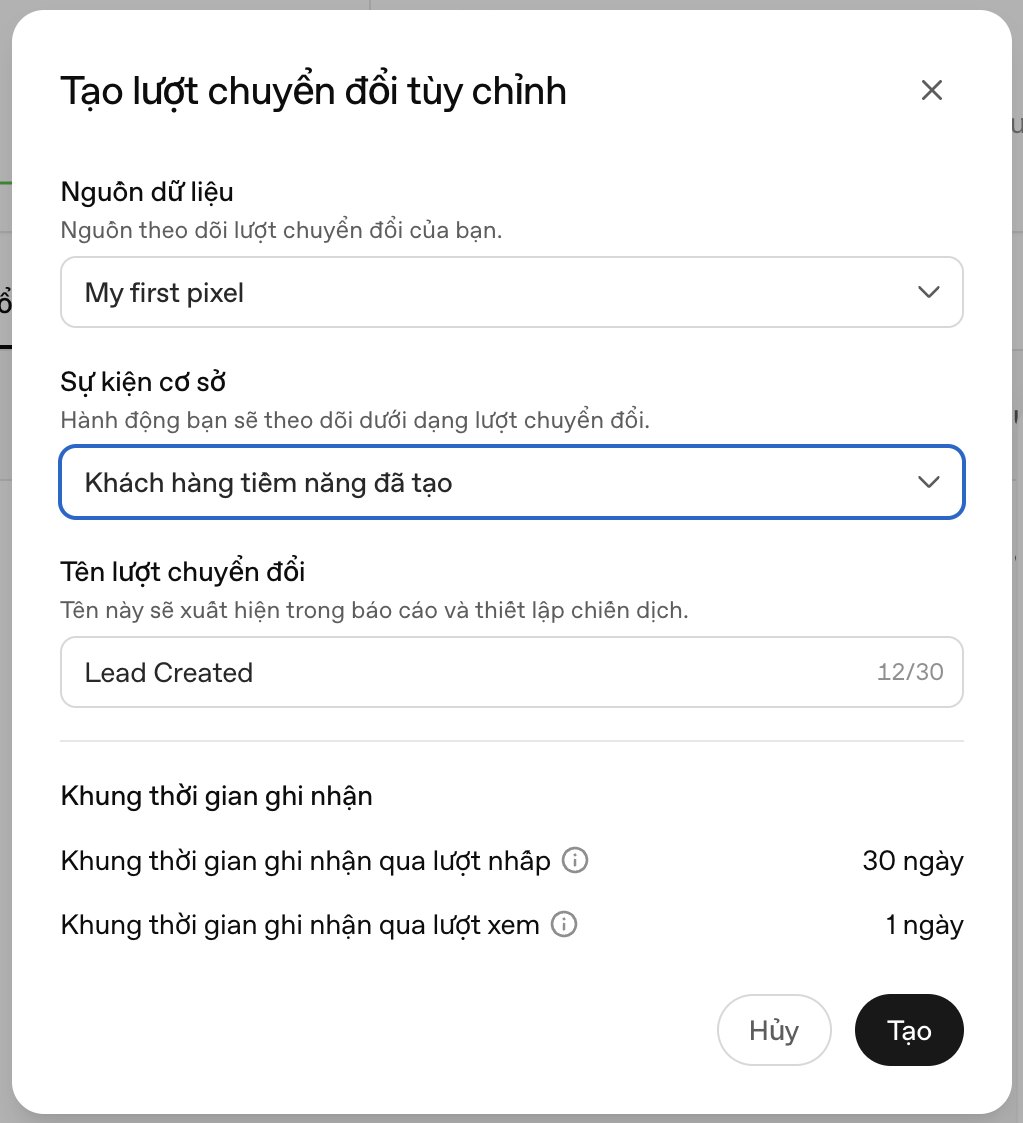
Switch to the Conversion events tab and click Create. Fill it in as follows:
- Data source: choose the pixel you created in step 1.
- Base event: choose Lead created.
- Conversion name: leave the default Lead Created, or give it your own name. This name appears in reports and when setting up campaigns.
- Attribution window: by default 30 days after a click and 1 day after a view.
Step 4. Add the event call to your form
Once created, Ads Manager gives you a short snippet of code:
oaiq("measure", "lead_created", { type: "customer_action" });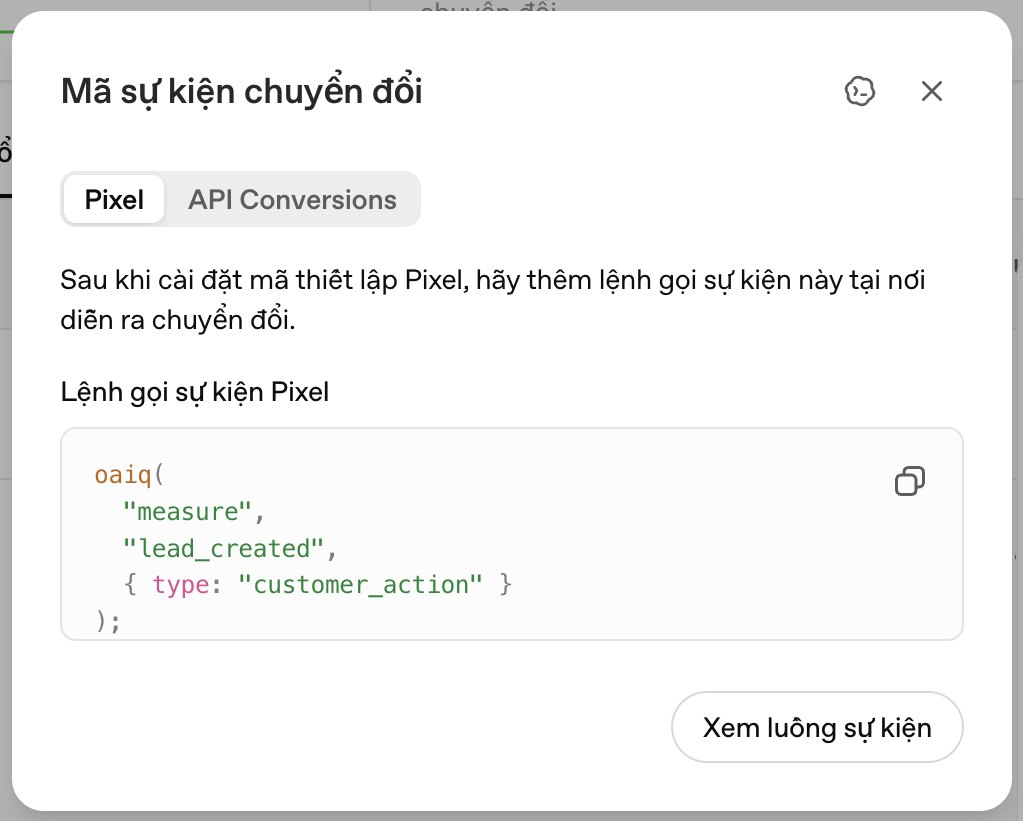
This snippet must run exactly when the customer successfully submits the form. This is where mistakes happen most often:
- Correct: call it after the form has been submitted and the thank-you message appears, or place it on the thank-you page.
- Wrong: calling it as soon as the customer clicks the button, while the form is still incomplete or has a submission error. The conversion count will then be higher than the number of real customers.
- Wrong: placing this code at the top of the page. Then anyone who opens the page is counted as a customer.
Step 5. Check that the event is being received
Open the landing page, fill in the form once as a test, then go back to Ads Manager and click View event stream. The Event stream tab shows the events just received.
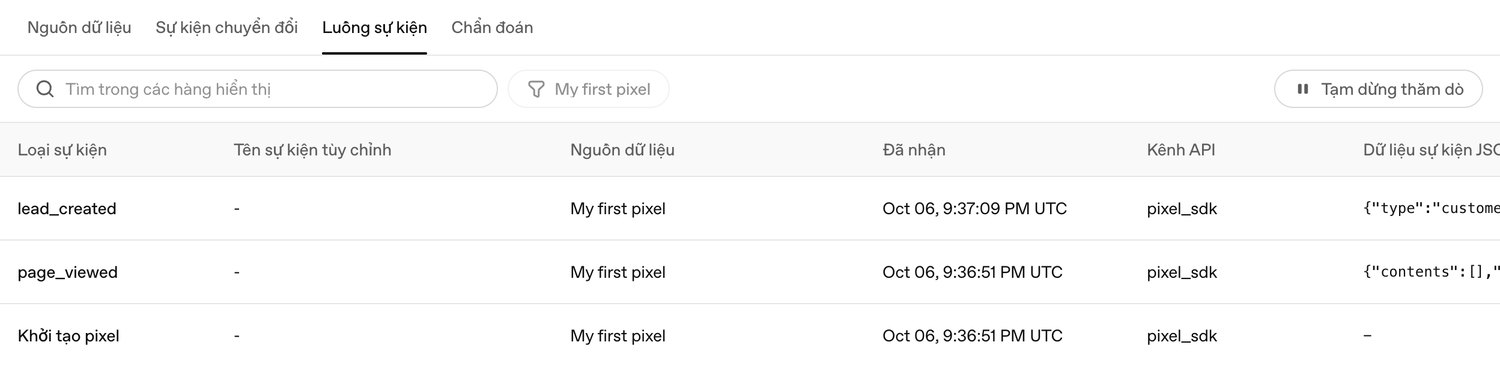
Three rows like in the image mean tracking is working: Pixel initialised and page_viewed appear when the page opens, and lead_created appears after the form is submitted successfully.
If you don't see them, check in this order:
- Whether the pixel ID on the website matches the pixel you are viewing in Ads Manager.
- Whether the browser has an ad-blocking extension enabled. Try an incognito window with extensions turned off.
- Whether the form was actually submitted successfully.
- Wait a few minutes and reload, as data can arrive with a delay.
Step 6. Create the campaign
Click Create in the top right corner and choose to create a campaign. This part has three small steps: campaign, ad group and ad, then review.
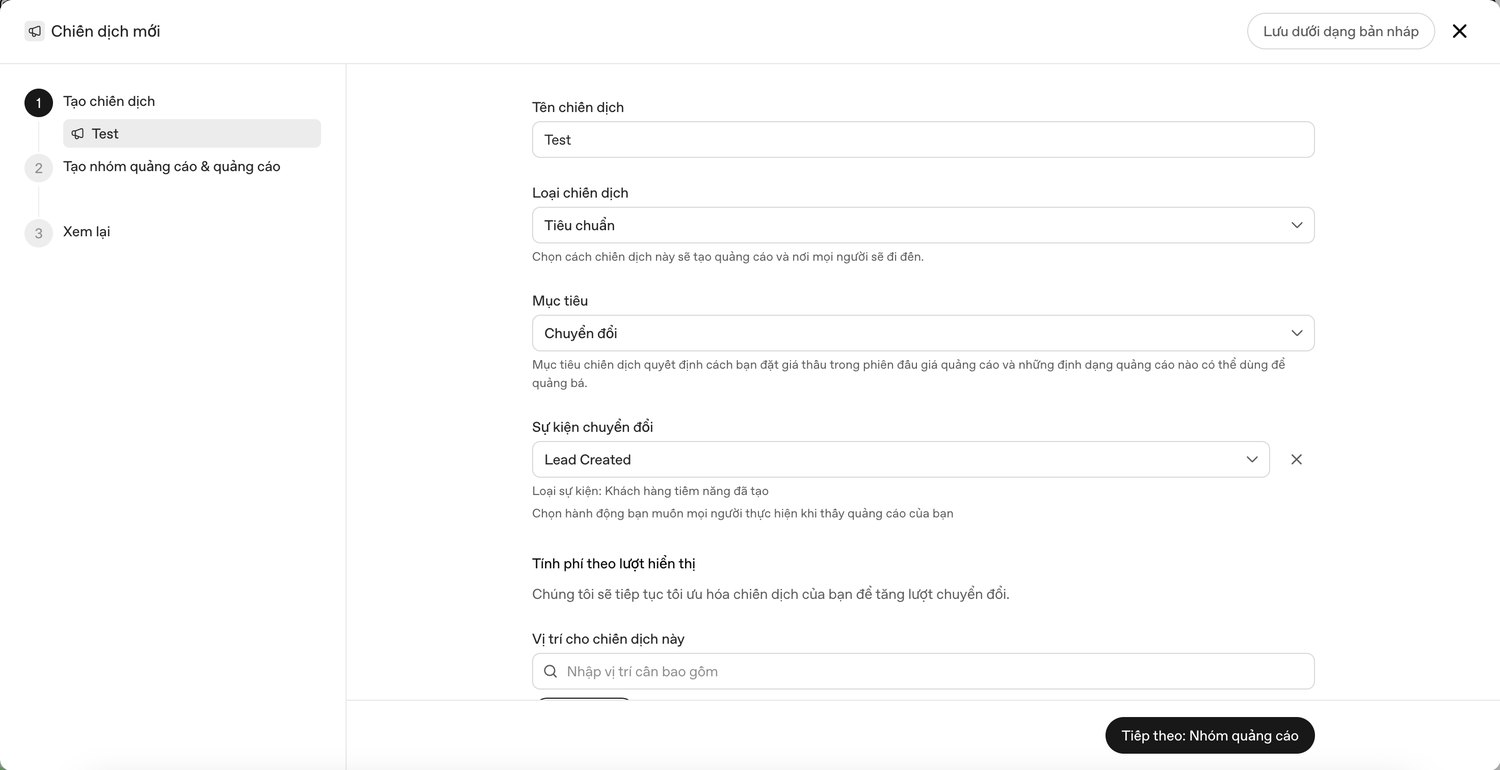
- Campaign name: name it by product and time period so it's easy to find later.
- Campaign type: Standard.
- Objective: Conversions.
- Conversion event: choose the Lead Created event created in step 3. If the list has two events with the same name, choose the one belonging to the pixel installed on your website.
With this objective, the interface states clearly that the campaign is charged per impression, and the system optimises automatically to increase conversions.
Locations, platforms and tracking parameters
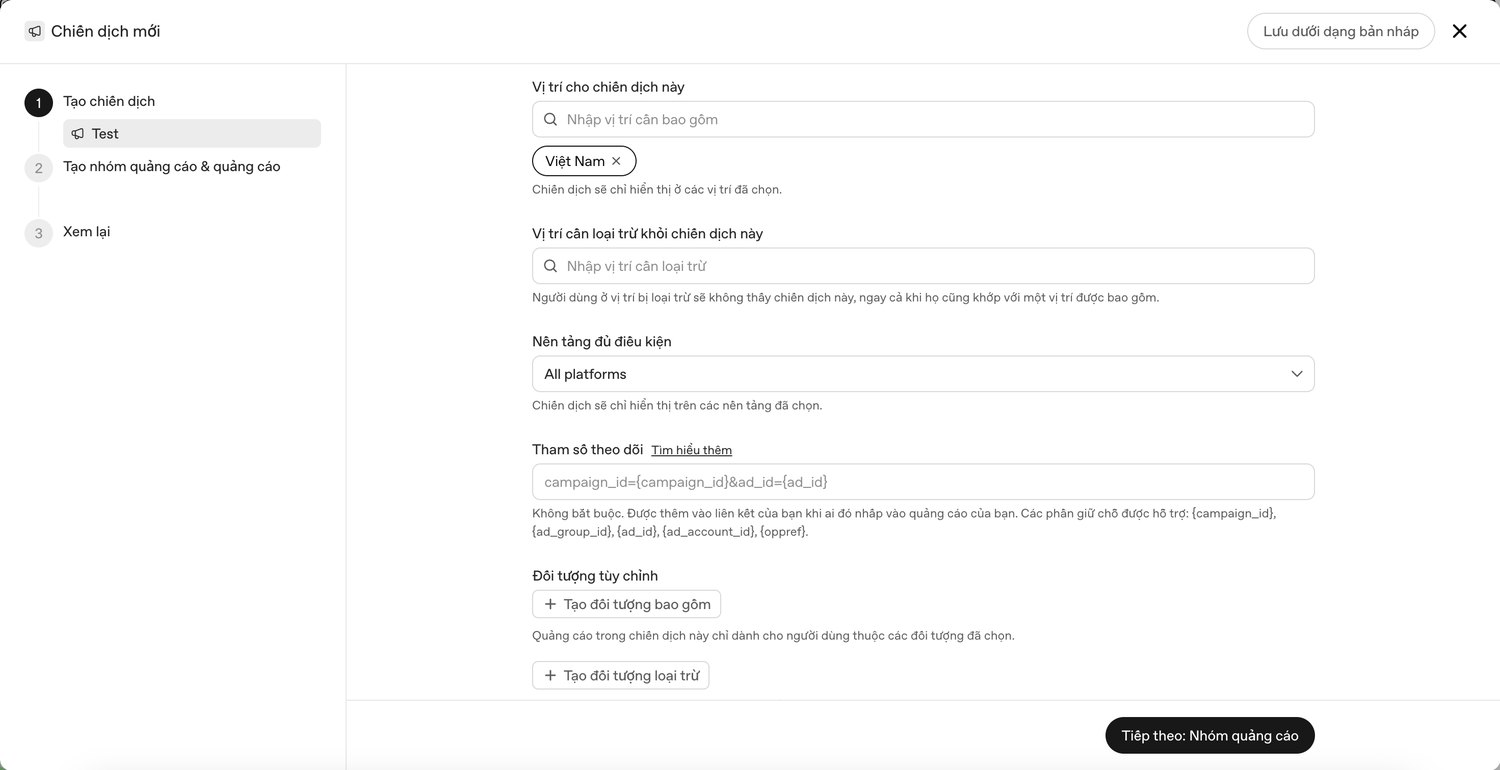
- Locations for this campaign: choose Vietnam, or the area you serve if it is in the list. You can also add locations to exclude.
- Eligible platforms: leave it as All platforms unless you have a reason to limit it.
- Tracking parameters (optional): added to the link when someone clicks the ad. For example,
campaign_id={campaign_id}&ad_id={ad_id}helps you know which campaign and ad a customer came from. - Custom audiences: use these when you want to show ads only to, or exclude, a group of people you already have. You can skip this for your first campaign.
Step 7. Create the ad group
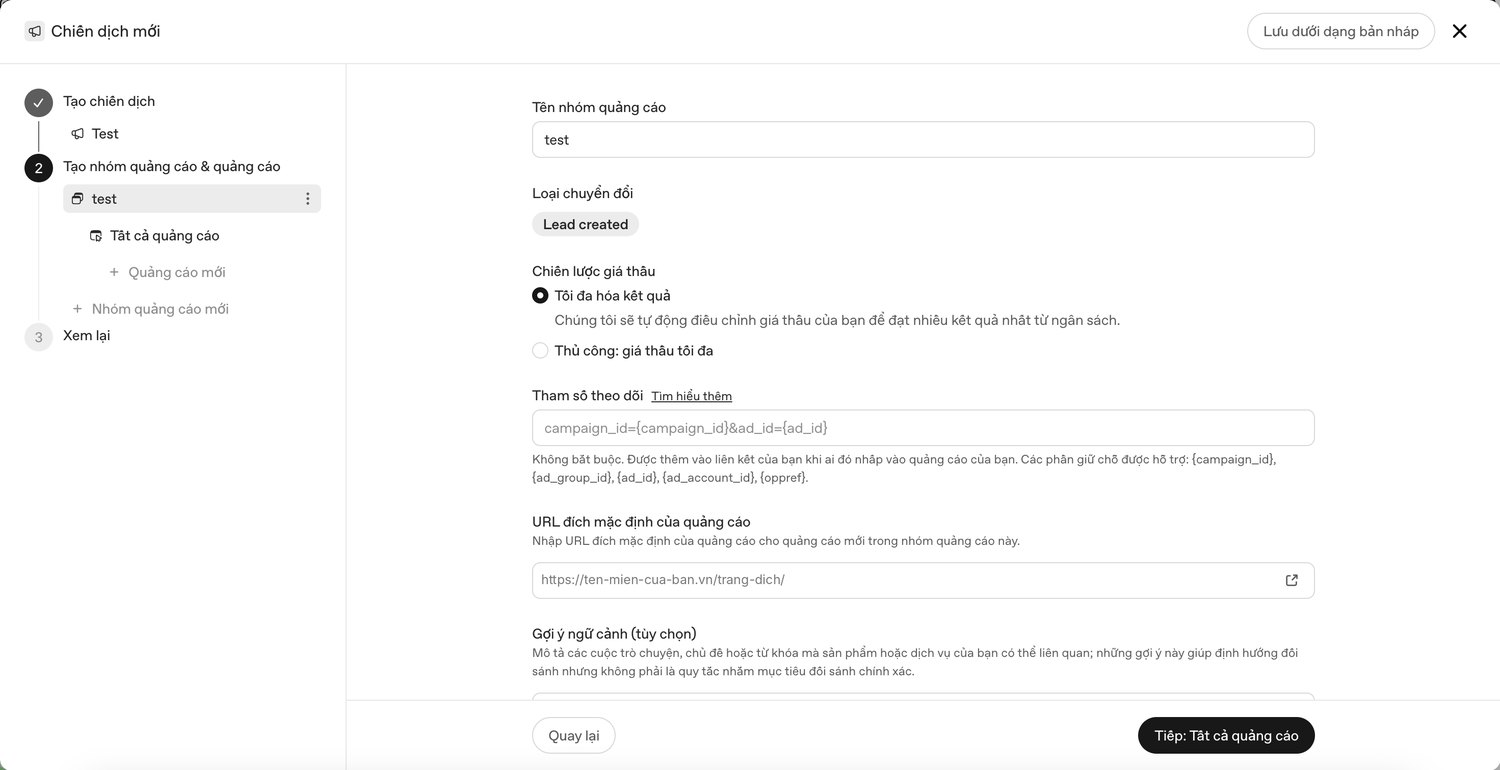
- Bid strategy: there are two options. Maximise results lets the system adjust bids automatically to get the most results within the budget. Manual: maximum bid lets you set the ceiling yourself. When you are just starting out and have no data, the first option is easier.
- Default destination URL: paste the link to the landing page with the form, not the home page.
Context hints
This is the part most different from search ads. You don't enter keywords; instead you describe the conversations, topics or questions your product is relevant to. The interface states clearly that these are hints to guide matching, not exact targeting rules.
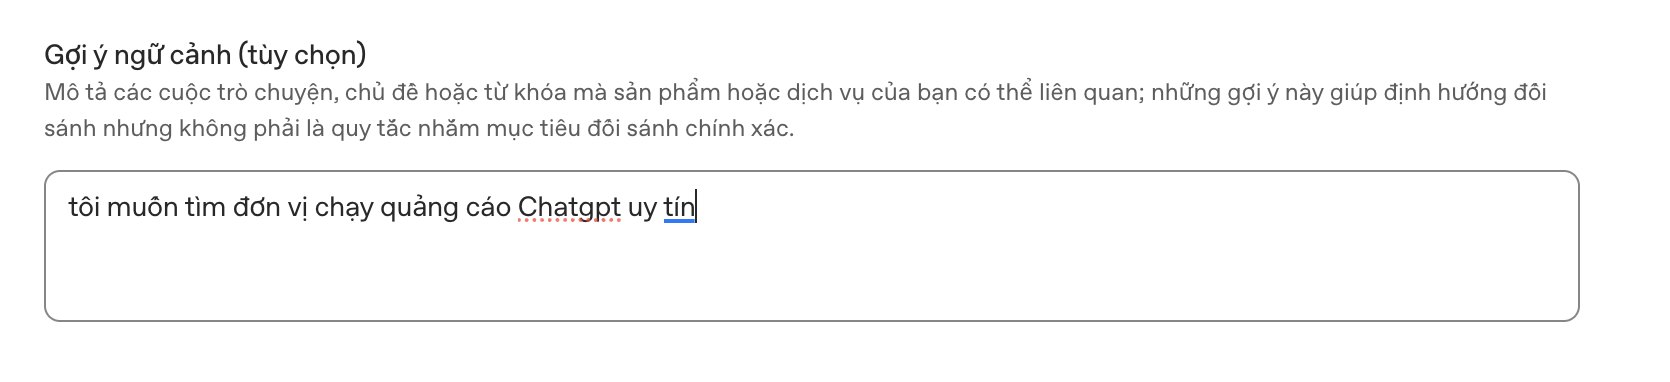
How to write them well:
- Write in natural sentences, the way customers ask ChatGPT.
- State the need, audience and location if relevant. For example: “a parent looking for an English centre in Hanoi for a child in grade 6”.
- Write several different situations instead of repeating one idea.
Step 8. Create the ad
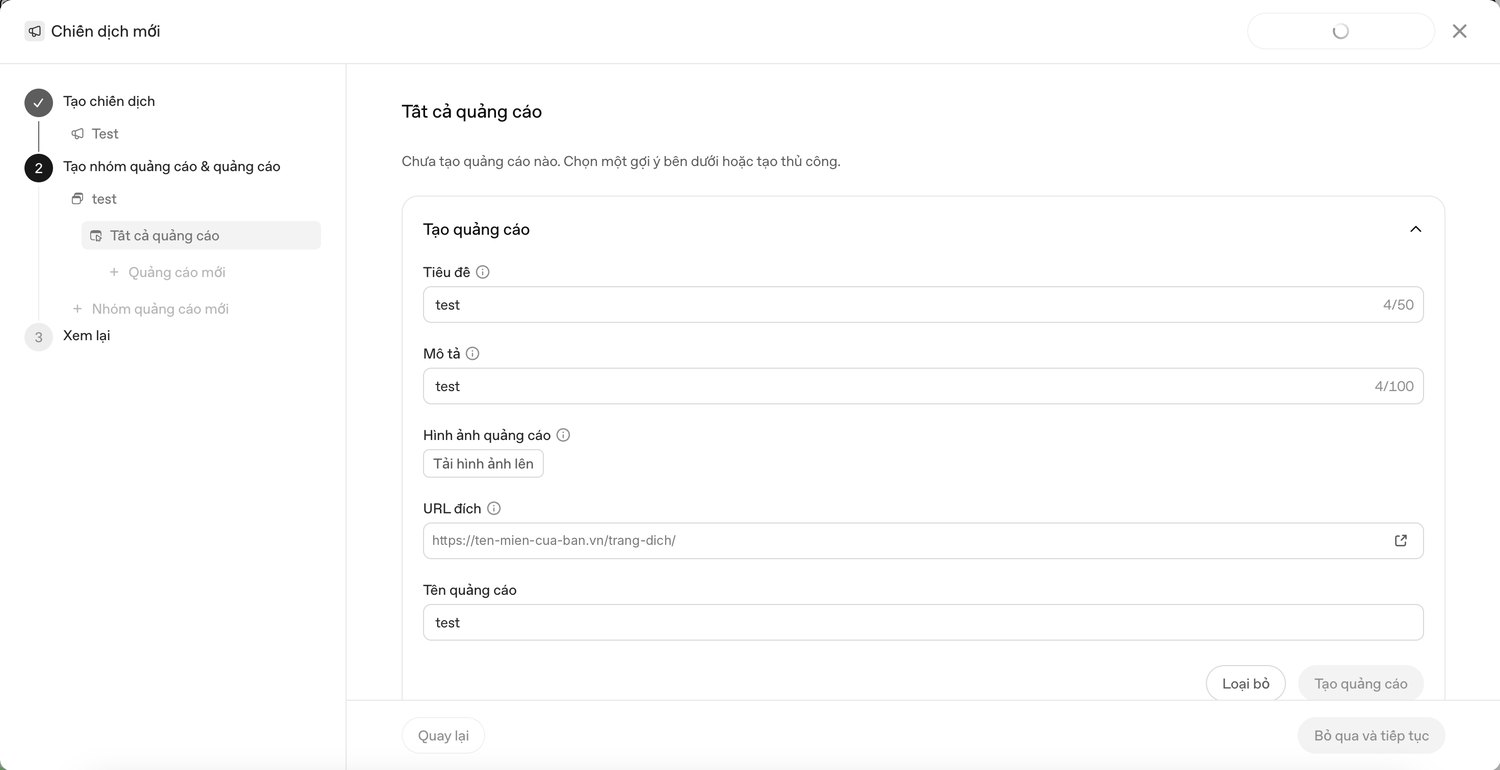
- Headline: up to 50 characters. Say clearly what you offer.
- Description: up to 100 characters. State the main benefit and the action you want, for example booking a consultation.
- Ad image: upload a clear image with little text.
- Destination URL: double-check that the link opens the right page and the form works.
- Ad name: an internal name to tell your versions apart; customers don't see it.
Create two to three different ads in one group to compare them.
Step 9. Review and submit for approval
At the Review step, check everything once: conversion event, locations, budget, links. After submission, ads must pass OpenAI's review before they are shown. If an ad is rejected, the Overview page will show a notification so you can see the reason and make changes.
Common mistakes
- Creating duplicate pixels or duplicate events. A campaign tied to the event of a pixel that isn't on the website will never record conversions.
- Calling the event on button click instead of on successful submission. The data is inflated and the system optimises incorrectly.
- Sending ads to the home page. Customers have to find the form themselves, so the sign-up rate is low.
- Launching the campaign before checking the event. You spend money without being able to measure.
- Writing context hints like a keyword list. Write them as specific situations instead.
Screenshots in this article were taken from the Ads Manager interface (Beta) in 10/2026. OpenAI may change the interface and the names of sections.
Want someone to work with you?
SAL - AI sets up tracking, builds campaigns and reports on ChatGPT ads for businesses. The first consultation is free.
See our ChatGPT ads service